While every customer’s infrastructure is unique, here is a diagram illustrating the general layout of the Eclipse cloud/hosted environment:
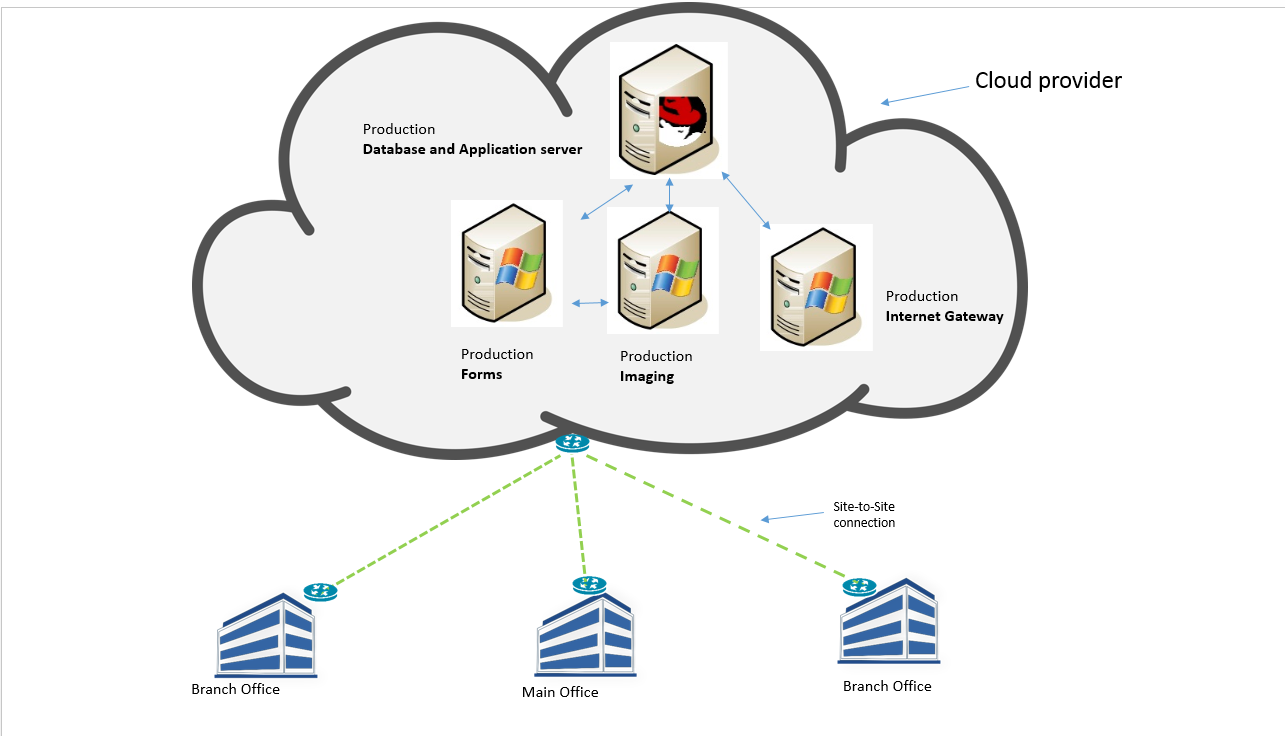
While every customer’s infrastructure is unique, here is a diagram illustrating the general layout of the Eclipse cloud/hosted environment:
UniVerse Database Replication
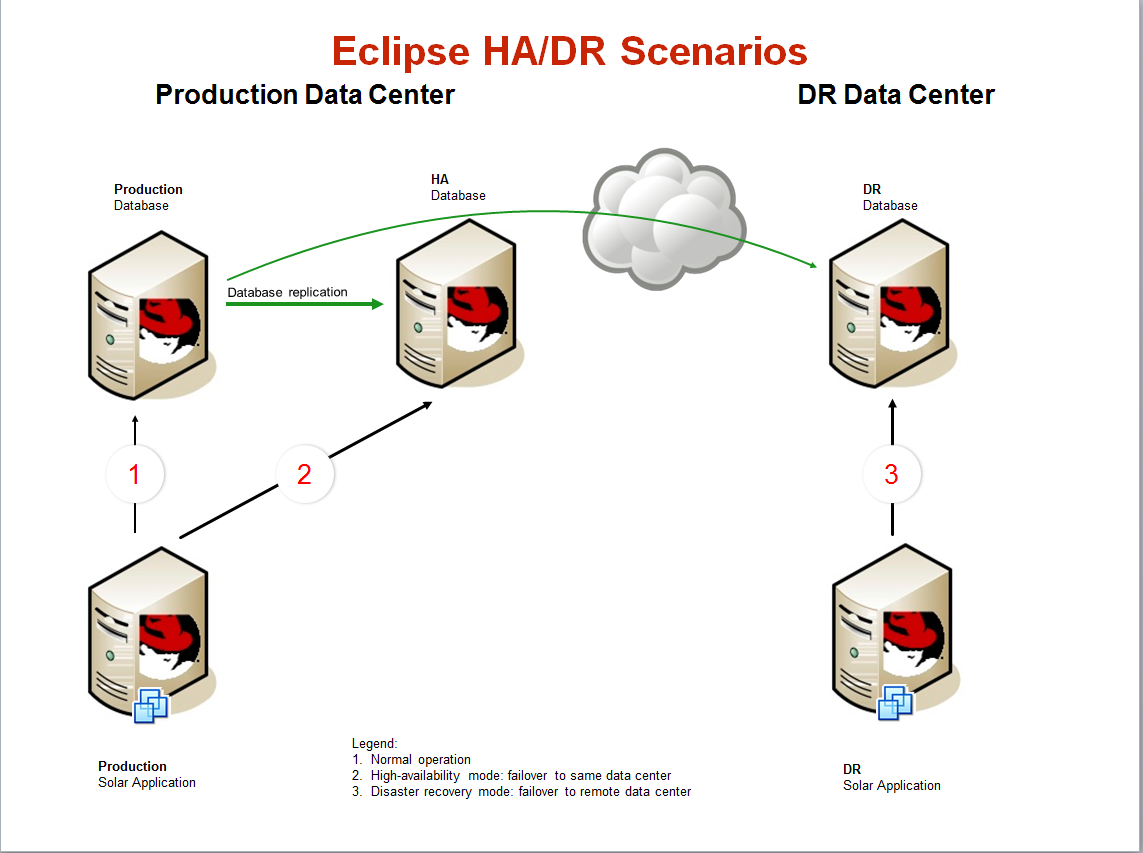
Data replication frequency: typically “real time”
Time to recovery: typically a few minutes
Eclipse customers that want “real time” replication can use UniVerse’s native replication functionality. The software is configured to capture writes to the database and replicate them to a secondary server while preserving the integrity of the database. Recovery is also quick, since the Eclipse software is already up and running on the secondary server. This solution is implemented and supported directly by the database vendor, Rocket Software, so please contact your account manager for more details.
NOTE: these steps must be performed on the same LAN as the device.
arp -s 192.168.2.2 00-00-9d-22-23-60
arp -s 192.168.2.2 00009d222360
ping 192.168.2.2
vi /etc/hosts
192.168.2.2 digi
If your system is configured to perform an rsync backup as part of the standard snapshot script, simply run the following command:
at now -f /u2/UTILS/bin/snapsave_linux.sh
To schedule the backup at specific date and time, for example at 11PM today, change now to 23:00.
at 23:00 -f /u2/UTILS/bin/snapsave_linux.sh
This script will suspend your database, take snapshots of the database files and create a full tape backup. You will not see any output in your console session, because the script creates a separate log file under /tmp/snapsave.log.
If you have already created the snapshot filesystem, but you want to perform a separate manual tape backup:
rsync -avz --delete --stats /snap/u2/ /mnt/nas/rsync/
If there are no snapshots present, but no users are on the system and you want to perform a manual rsync backup:
rsync -avz --delete --stats /u2/ /mnt/nas/rsync/
References:
How to use the at command
How to use rsync
To use an Android device to connect to a client-to-site IPsec VPN without having to import a certificate, use shared key authentication. Your device must use Android version 4.0 or above.
IPsecWithSharedKeys).62.99.0.51).IPsecVPN).
After configuring the Android device, you can connect to the IPsec VPN.

