How Do I Setup or Change the IP Address on a D-Link Print Server?

In the link below you will find the utility itself called PSAdmin.  You need to install PSAdmin on a PC that is on the same network as the print server.  Be sure the print server is plugged into power and a network switch.  You can then use the PSAdmin tool to set or change the IP address (Use Manual IP, NOT DHCP), set the subnet mask which is typically 255.255.255.0 and set the Default Gateway (usually the IP address of the router at that location).  There is a detailed PDF file that has instructions for using PSAdmin to setup the DP-301 Print Server.

http://download.mos.com.np/Drivers/D-Link/printservers/PS%20Admin/
How Do I Change the Time on a Linux Server?

The command date -s <date or time string> will set the system time and/or date. Where <date or time string> should be enclosed in double-quotes (“) and describe the date and/or time that you would like to set.

For example:
date -s “31 OCT 2011 13:55:00”
This command needs to be run as root in order for it to work.

Example to set just the time:
date +%T -s 07:54:00

You can also use the plain date command to display the current system date and time.
Note, you must restart the system admin in order the system time change to be reflected in Eclipse.

How do I update my Eclipse credit card service to use the new TSYS domain?

Here are instructions for updating the URL with which your Vital/TSYS credit card service is configured to process transactions. This change is necessary for continued successful integrated credit card processing. After March 31st, 2012, Vital/TSYS is retiring the current domain. For more information, please refer to their bulletin on the subject.

The new domain, ssl1.tsysacquiring.net, is already available. You should adjust your credit card service to use the new domain using the directions below at any point prior to March 31, 2012 to avoid service disruption. If your network infrastructure limits connectivity to specific domains, you must update your network configuration to allow secure connectivity to the new domain.

If you no longer process credit card transactions integrated through Eclipse, or have migrated to the Element solution (or plan to do so before March 31, 2012), these instructions do not apply.

  • Log into the Windows server that runs the credit card service.
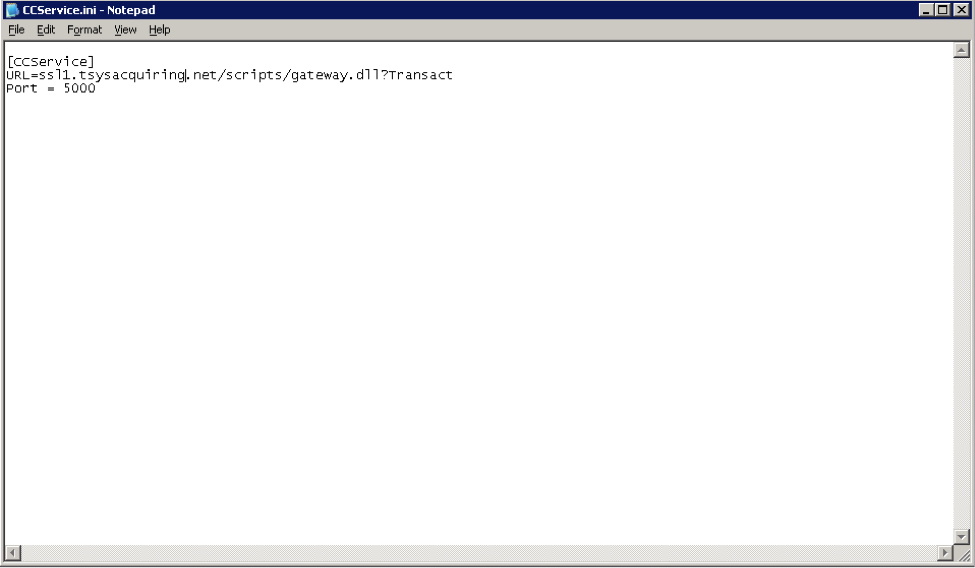
  • To open the appropriate configuration file for editing, click Start, select Run, and enter the following path:
    "C:\Program Files\Eclipse\Eclipse Credit card authorization service\CCService.ini"
  • Change the “URL=” value to:
    URL=ssl1.tsysacquiring.net/scripts/gateway.dll?Transact

  • Select File and Save before closing the text editor
  • To launch the Management Console’s Services control panel, click Start, select Run, and enter:
    services.msc
  • Right-click on the Eclipse Credit Card Authorization Service, and select Restart.


If you have any questions or issues with these instructions, please enter a Service Request with our Systems team for assistance.

How do I run diagnostics on my Tandberg tape drive?

If the Tandberg TDtool diagnostic application is not yet installed, download and extract it to a temporary directory:

mkdir -p /esupport/tandberg && cd /esupport/tandberg
wget http://www.tandbergdata.com/default/assets/File/Downloads/tdtoollinux64.tar.gz
tar xzvf tdtoollinux64.tar.gz

To run the diagnostics, first log in to a graphical session (via VNC, DRAC or locally at the console).

Launch a terminal, and then launch the diagnostics:

cd /esupport/tandberg
./tdtool.sh

From within the diagnostic tool, verify the your tape drive’s information appears correctly, as shown in the example below:

To run a test backup, select Tape IO Test. For a complete test, enter an amount of data close to the size of the your database.

For additional information, please see Tandberg’s website: Tandberg Support Tools

How do I create a mksysb DVD backup on AIX?

Run:

smit mkdvd

When prompted to “Use an existing mksysb image?” choose “No”

When prompted for “DVD backup media format?” choose “1 ISO9660 (CD format)”.

Choose the following options:

                         Back Up This System to ISO9660 DVD

Type or select values in entry fields.
Press Enter AFTER making all desired changes.

                                                        [Entry Fields]
  DVD-R or DVD-RAM Device                            []                           +

  mksysb creation options:
   Create map files?                                  yes                         +
   Exclude files?                                     yes                         +
  Disable software packing of backup?                 no                          +
  Backup extended attributes?                         yes                         +

  File system to store mksysb image                  [/u2/mksysb]                            /
     (If blank, the file system
       will be created for you.)

  File system to store DVD file structure            []                            /
     (If blank, the file system
       will be created for you.)

  File system to store final DVD images              []                            /
     (If blank, the file system
       will be created for you.)

  If file systems are being created:
    Volume Group for created file systems            [datavg]                     +

  Advanced Customization Options:
  Do you want the DVD to be bootable?                 yes                         +
  Remove final images after creating DVD?             no                          +
  Create the DVD now?                                 no                          +
  Install bundle file                                []                            /
  File with list of packages to copy to DVD          []                            /
  Location of packages to copy to DVD                []                           +/
  Customization script                               []                            /
  User supplied bosinst.data file                    []                            /
  Debug output?                                       no                          +
  User supplied image.data file                      []                            /

Press Enter to begin the system backup creation when you finish making selections. When the operation completes successfully, there is a file or files located in the /mkcd/cd_images directory.

Transfer the file to a workstation with DVD burner. You may transfer it via any method of your choosing (i.e. FTP, moving it to a samba share, etc.).

Create a bootable DVD from the ISO backup image using your DVD-burning software.


Resources: