Testing Printer Driver Performance Using Formscape

Preparing for Testing

Download TestHandles.fsp: http://cl.ly/DdNr/TestHandles.fsp

Double-click to launch Eclipse Forms Designer

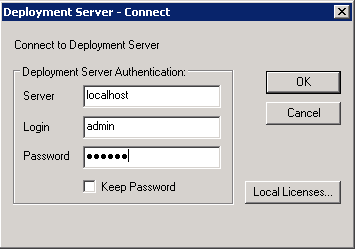
If this is your first time using the Designer, you will need to enter your server name (localhost) and credentials

If you are not licensed for Designer, you will need to contact Eclipse support for a temporary license.

Testing for Performance or Resource Leaks

Here’s the procedure for testing for resource (i.e. handle) leaks. The same procedure may be followed to test for general performance (i.e. CPU, memory utilization) by monitoring the appropriate resources in taskmgr or Process Explorer.

Launch the task manager (Start → Run → taskmgr → OK)

Go to the “Processes” tab

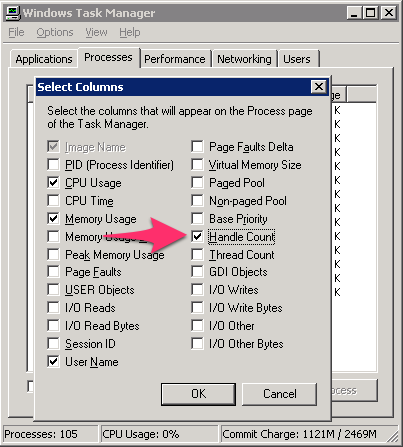
Select “View” → “Select columns…”, verify that “Handle Count” is selected, and press OK

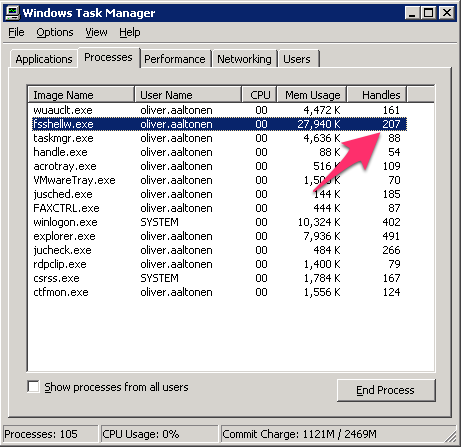
Locate the “fsshellw.exe” process and note its current handle count

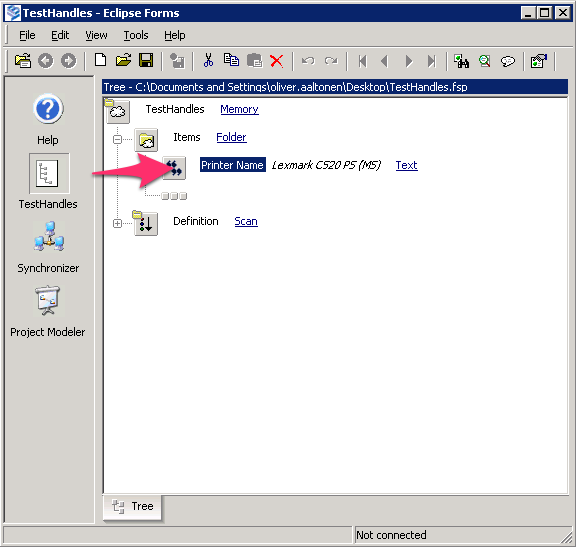
Back in Designer, click the “” icon next to “Printer Name”

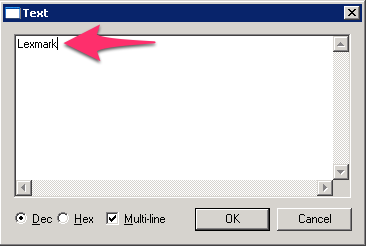
Enter the name of the printer to be tested, and press OK

If you would like to test more pages than the default 100, expand “Definition”, click the icon next to “Data”, enter the desired number of pages to “print” for testing in “The number to end the loop at” box, and press OK

Right-click the “Definition – Scan” button, and select Run

While the process is running, you will see activity in the bottom pane
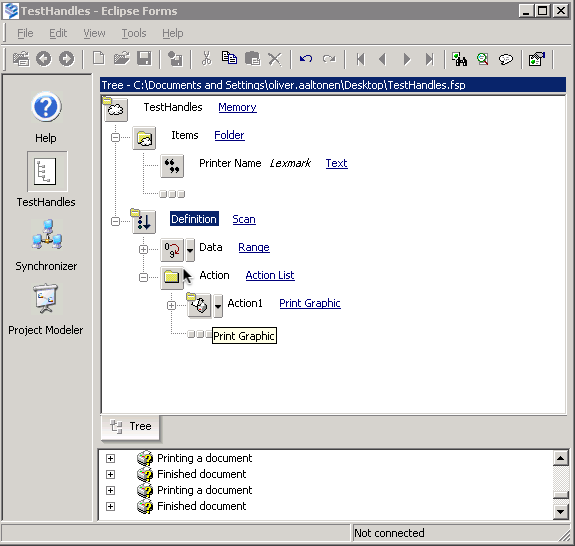
After the process has completed, take note of the handle count for the “fsshellw.exe” process

The number of handles should not have increased substantially. If the print driver has a handle leak, this number will continue to grow as more test pages are “printed”.
Okidata Printer Trouble-shooting

Factory Reset
With the printer off, hold FF/LOAD + TEAR then power the printer on.

Menu Reset
With the printer off, hold SELECT + LF then power the printer on.

Print Menu Settings
Enter menu mode by holding down SHIFT, then pressing SEL. Menu Light will go on.
(Press the PRINT key to Print the Configuration Page, if needed.)

GROUP: Prints the First Line in each Group in the Menu. (Press Group mult times to find emulation, etc)
ITEM: Prints next Item in the Group. (Usually press once to get to emulation)
SET: Prints next Setting for an Item in the Group. (To change a value)
PRINT: Prints Menu Settings or With the SHIFT key, prints current settings for the Group selected.
MENU: Light is ON when the printer is in the Menu Mode. Press Shift/Select (see Step One) to turn Menu Light off.

Tips & Tricks

  • Form Tear Off is in the “Rear Feed” group (typical setting is 500 ms)
  • Emulation Mode for Oki’s is usually ML or Epson FX (IBM PPR for Troy Pocket Pro)(For D-Link, try all 3).
  • To print a config page on an Oki with an internal print server, press the test button on the NIC with a paperclip

(For additional support, you may contact Oki Support at 800-654-3282 or use this link: http://my.okidata.com/)

Setting up a Local Printer (USB)

Setting Up a Local Printer

Local printing allows you to attach a printer to a users PC, install it on their PC and allow the user to print from Eclipse as well as windows. This is not a network printer.

1. Configure the Printer to Print from Windows. The Printer may be a Networked Windows Printer, or connected locally utilizing a USB Port or a Parallel Printer Port. Make the Printer your Default Windows Printer if using USB. For Parallel Port or Networked Windows Printers, the Printer need not be the Default Windows Printer (although we would RECOMMEND it be the Default Windows Printer.)

2. Login to Eclipse.

3. Select Terminal Setup from the F2-System/System Files… menu.

4. Locate your Terminal ID and place the cursor on that line. If there is not one you will need to setup a Terminal Id. This can be done by accessing the Terminal Setup screen in Eclipse. F2/F/T.

Once your ID is created, Highlight it and select ALT/S to get the Local Printer Menu

Figure 1 Local Printer Menu.

5. Under the Local Printer field hit the F10 key and select the ‘HPLJ’ or HPLJ-1TRAY’  for a Laser Printer or ‘Printronix’ for a Dot Matrix or Zebra Label Printer. Local Laser Printers support One Tray ONLY.

6. Under the Form Loaded field hit the F10 key and select the form you desire.

\*ANY* is the most common form loaded on a Local printer and means that

everything you print from Eclipse will print to your Local printer even if you select another Eclipse printer..

7. Press Esc to exit the Local Printer Assignment screen and save your settings.

8. Access your Eterm Configuration screen by selecting Configure and then Communications from the grey menu bar in Eterm.

Figure 2: Configure/Communications screen.

9. Move the cursor to the ID field and type in your Terminal ID.

Note: It is important to type your User ID exactly as it appears on the Terminal Setup screen, including capitalization where appropriate.

10. Click on OK to save your changes.

11. Access the Configure/Printing menu in eterm and check off ‘Default Printer’ if USB connected, ‘Selected Printer’ may be used if Network or Parallel Port is used. This will give you the option to select the installed printer from your computers installed printers. Once selected click on OK.